
Personally I'd rather be able to take more images while shooting, and have more control over the end-product. This is especially true when creating the HDR image requires multiple exposures (every HDR image requires at least 3 images, but 7-9 are more common) that are over longer than normal exposure times. For example, the first image on this page is an HDR image that was combined from 7 different exposures. This played with the streaks from the cars and the lights on the buildings as well as traffic lights. It also gave nice depth throughout the dark portions of the buildings, tracked the movement of the moon a little behind the Union Bank building and gave me the option to use a single image for a print later, or the end-product HDR image.
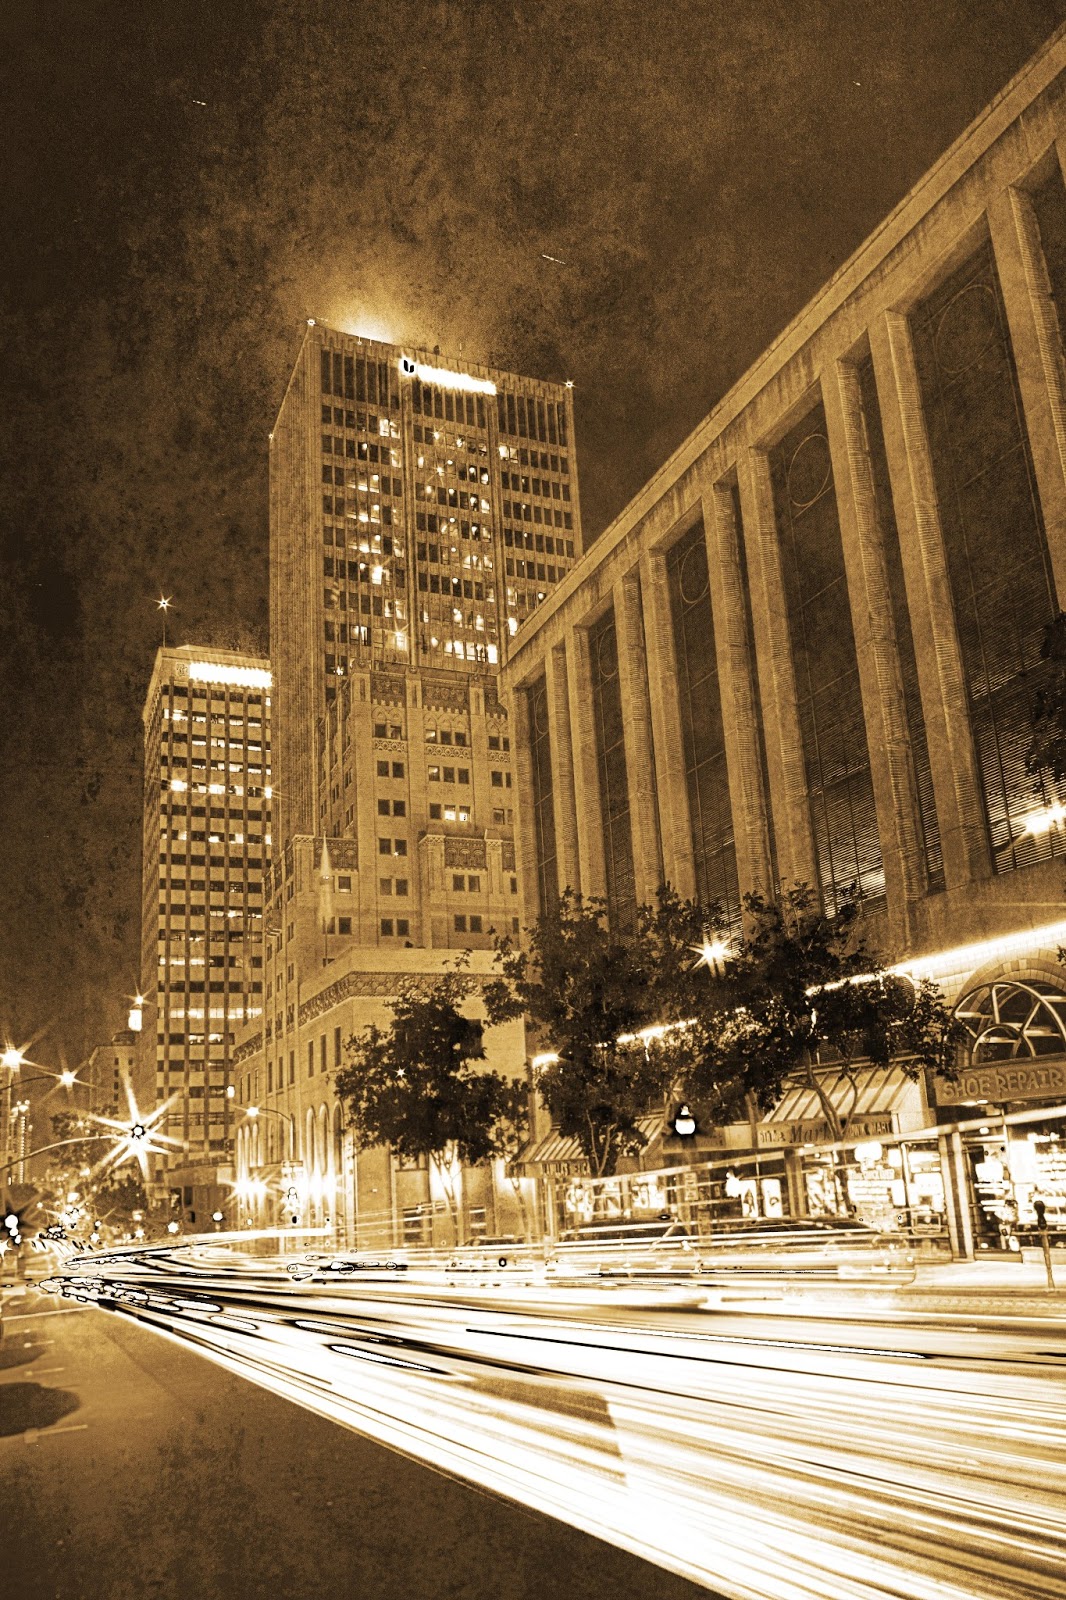
The image here on the right is the same HDR image as above. It's the same except for its differences. I took the original HDR image that I had initially created, converted it to Black & White (during that process I was able to push and pull various color layer attributes to make the black and white version even more interesting with detail and contrast), then I added a sepia layer to it. The Sepia layer added a lot of character for the image, but left the buildings feeling like they were new constructions in an old world. Finally I added a layer of texture to give the image a feel like it was manually printed on a heavy tooth piece of cold-press, warm-tone paper. That little difference made the image work, and I was able to give it some other special treatment, like over darkening the trees to balance out the blinding light of the cars, etc. There are some things that can't be done in camera, while it's best to get the exposure and composition as close to perfect in camera as possible, some things are better left for Photoshop.